I know its hard to believe, but I'm not dead! I just haven't been using my computer very much. In fact I haven't been crafting or photographing nearly as much as I should have been. Instead I've been running! My husband and I started the Couch to 5k program and are really loving it! We're just starting on week 4 and its getting pretty intense.
The odd thing is that I'm actually really enjoying it. I mean the pain can be unbearable, but I really don't want to stop!! We've signed up for 2 races so far! We'll be running in the MayFaire 5k on May 7th which is just after we finish the 5k program. Then in January of 2012 we are running in the Warrior Dash which totally looks crazy and fun.
I've also been reading The Non-runner's Marathon Guide for Women: Get Off Your Butt and On with Your Training and although I know it will be a long way away I think it might be something I'd like to do! We've got a few other races to conquer first starting with our 5k, then a 10k, 15k, 1/2 marathon, and probably then the marathon. Its a long road, but running with my husband is one of my favorite parts of the day!!
I've also been eating a WHOLE lot healthier! LOW fat, LOW calorie, and HIGH protein. It really hasn't been as hard as I thought it would. We eat a ton of chicken and turkey and eggs! Brown rice, baked beans, green beans, and other random veggies. We've also added some low cal, low fat, low carb ice cream bars to the freezer so it feels a lot less like a diet and a lot more like heaven!
On the bright side I've lost 20 Freaking pounds! The down side is that my pants fall off and I don't have any bras that fit well. Oh poor poor me :) 5 more pounds and I'll be getting my nose pierced!
I think that is about all that is new as of late, but boy oh boy am I loving life a whole lot more now!
~LuLu
Sunday, March 6, 2011

Friday, February 4, 2011
Headband and Hairbow Holder Tutorial


Materials:
 -Empty Oatmeal Container (or other similar container)
-Cotton Batting (like for quilts The cheap stuff is perfect I didn't have that so I used what I had)
-Fabric of your choice to cover container (I didn't measure but it can probably be done with a fat quarter)
-Hot glue gun and plenty of glue
-Coordinating construction paper
Step 1: Take cotton batting and wrap it around the container twice. I did this with the lid on so that I wouldn't accidentally glue it too high and then not be able to use the lid later! I glued one side seam, then did top and bottom at the same time in small sections, then did 2nd side seam and was able to trim extra off then.


Step 2: Since your fabric will be longer than your container just do the middle seam for now. Do one side. Wrap fabric around pulling tight and then glue down. If the edge is raw and fraying consider folding over before gluing for a more polished look.

Step 3: Starting on the bottom of your container. Trim fabric so its only has about an inch extra. Then slowly glue the excess fabric down stretching it tight as you go and smoothing wrinkles.


Step 4: This is pretty much step 3 repeated on the top only I glued in 2 places on the top. I did my first glue just over the lip of the container on the inside all the way around. Then I glued again under the lip (it sorta sticks out a little in the container.


Step 5: Cut 2 circles just smaller than your container one to cover the bottom to make it pretty and one for the lid.... Or skip the bottom I mean who looks at the bottom... and spray paint the lid :)

Step 6: (Optional) Use a piece of construction paper to cover the inside of the container. Cut to the same length as the inside of the container then glue inside to cover raw edges. (I don't know if I'll go back and do this for myself, but if I were making it for some one else I TOTALLY would!)
Step 7: Drill or use scissors to poke a hole in the top of the lid. Take a piece of ribbon and tie a bow with 2 reallllllly long ends and double knot it.... (like tying your shoe) then feed this into the hole in the lid. The knot should keep it from falling through. Then tie a knot on the inside of the lid to keep it from pulling out. Tie a knot in the end of each string that is hanging into the container to keep things from sliding off. (SOOOOO sorry there aren't more pictures of this step it was sort of a quick decision that turned out great but doesn't have pics, but look at the 2 pics at the top to sorta see what I mean!)
On the top I clipped a bow that I really like and thought looked good on top, but you could do anything to decorate the top or just leave with the little bow.
Then pile on the head bands and clip on the hair bows. My counter is a TON cleaner now and I can still see everything... and ACTUALLY find what I'm looking for!
Download this Tutorial as a PDF
***Please don't re-post my tutorial on your site or directly to my PDF instead PLEASE link to my blog post and let them get the tutorial from MY BLOG. I appreciate it a ton! ***
~LuLu
Friday, January 21, 2011
Hello Kitty Bow Tutorial and Giveaway

Materials:
Bow Template
Black Felt
Red Felt (or any color you like)
Black Thread
White Marking Pencil or tailors chalk
Pins
Scissors
Needle
Download and print the Bow Template and if you want the Tutorial Too. I print mine on Card-stock and think it gives it a bit more durability for multiple bows.
Step 1- Cut out Pattern Pieces (I don't cut those inner little circles I free hand those on the felt by site because they are too small to trace.)


Step 2: Cut out 3 felt pieces 2 Black and 1 pink (or what ever you want)

Step 3: Use fabric marking chalk to trace and then cut out the Front of the bow on the felt.

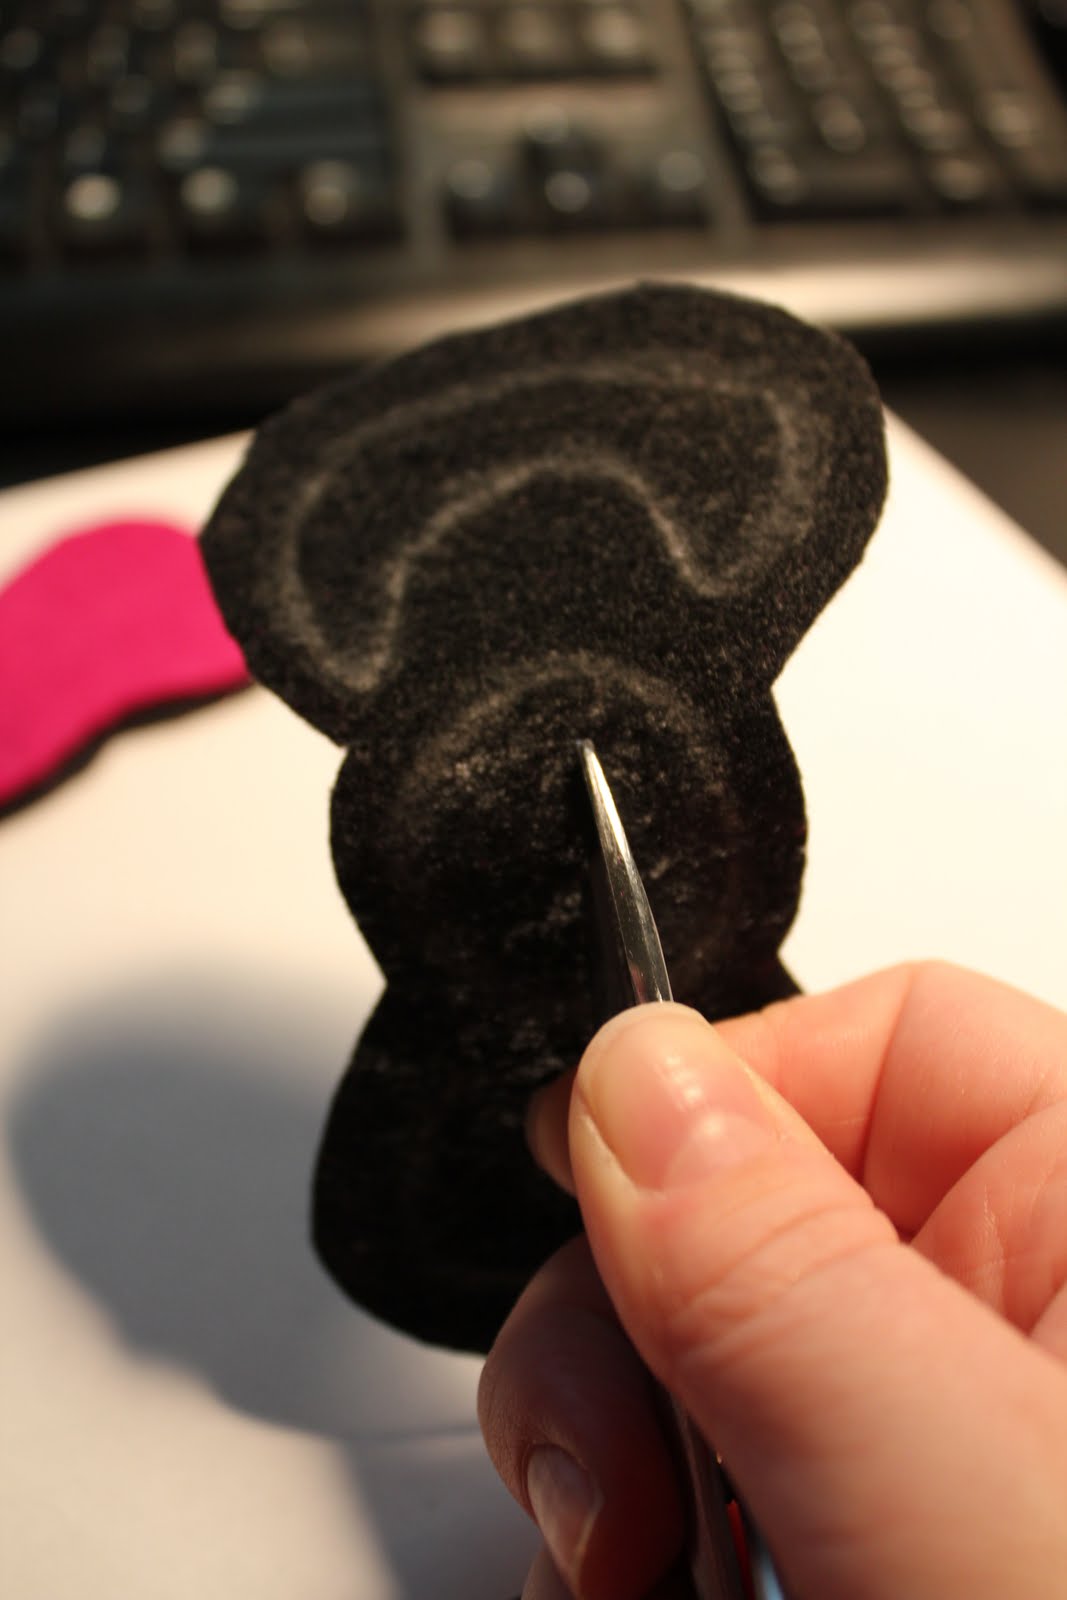

Step 4: Attach the little oval-ish piece to the back of the back piece of your bow. I use the machine for this part or double and triple stitch by hand for strength and durability.

Step 5: Sew around the edges of the top part of the bow (inside and out) see the picture. I did this in paint so you can sort of see where I sew

TA - DA!!!! Finished!

to wear slip a hair clip into the back and clip into hair, use a bobby pin, slip on a head band (See my Pic at top of post), use safety on an outfit or bag, or whatever! I totally want to see your finished products and HOW you wear them!!
***Please don't re-post my tutorial on your site or directly to my PDF instead PLEASE link to my blog post and let them get the tutorial and template from here. I appreciate it a ton! ***
GIVE AWAY! I'm feeling generous so I'm giving away one of my bows! You pick the color (Red, Pink, or Purple)....
1. Leave a comment telling me what color you would want and how you'd wear it and you're entered to win
2. Follow my blog and leave a second comment for a 2nd chance to win!
***Edit*** Winner will be picked Friday February 4th at 8pm Est (sorry I left this out before) ***
~LuLu


Tuesday, January 18, 2011
Crock- Pot Chicken Alfredo

Crock pot Chicken Alfredo
Ingredients:
2 - 4 Chicken breasts
16 oz Cream Cheese
2 Packets Italian dressing mix (I use 4 TBS homemade see recipe here)
2 cans Cream of Soup (pick your favorite chicken, mushroom, celery or mix and match)
6 TBS butter
Directions:
Dump all in Crock-Pot and cook on high for 4 hours or low for 6-8 or until chicken is done. Shred with a fork. Serve over noodles and add broccoli if desired.
Beeps seriously DEVOURS this stuff. It really might be his Kryptonite! I like this stuff too and gladly make it for my loving hubby, but no where near as much as him. It is easy and delicious!
~LuLu
Wednesday, January 12, 2011
Buffalo Chicken Pizza

Buffalo Chicken Pizza
Ingredients -
Left over chicken from Buffalo Chicken Sandwiches (or cooked shredded chicken soaked in franks red hot sauce Or substitute canned chicken that is drained and soaked in franks)
1 Pizza Crust or dough or DIY crust
1 Block Cream Cheese
1/2 jar blue cheese dressing
1 cup (ish) Mozzarella Cheese
Blue cheese crumbles (optional)
Drizzle of Franks Red Hot Sauce (optional)
In a bowl mix softened cream cheese with blue cheese dressing and shredded chicken* Spread this mixture over prepared crust. Sprinkle with blue cheese crumbles and hot sauce (optional) then cover with Mozzarella cheese.
Bake at 400 for 20 to 25 minutes or until cheese is melty, golden, and delicious!
Cut and serve warm.... But Beeps and I think its better after its cooled off a bit and the cheese has had time to set a little.... THEN LOOK OUT WORLD!
***Make sure you drain the chicken a little if it is really juicy or your pizza may be a little soggy***
ENJOY! I know we did!
~LuLu
Tuesday, January 11, 2011
Buffalo Chicken Sandwiches

Buffalo Chicken Sandwiches
Super yummy and super easy!
Ingredients
3 - 6 boneless skinless chicken breasts
2 tbs butter
1 1/2 cups Franks Red Hot Sauce
1 packet Ranch Dressing mix
Rolls or bread
cheese of your choice (BLUE All the way here!)
Directions:
Put chicken breasts in crock-pot. (They can be frozen!) Add 1 1/2 cup Franks Red Hot Sauce, 2 TBS butter, and 1 packet of ranch dressing mix. Cook on High for 4 hours or Low for 6. About an hour before serving open crock-pot and shred chicken with 2 forks. If low on liquid add more franks.
Serve on fresh rolls with blue cheese and additional hot sauce if needed. YUMM!!
ALSO Use leftovers to make Buffalo Chicken Pizza! I'll post a recipe soon!
~LuLu
Tuesday, January 4, 2011
Taco Soup
Here's a new Crock-Pot recipe that I've created! I forgot to take a picture!
Taco Soup
1 can of corn
1 can of black beans
1 can of red beans
1 can of rotel
2-3 chicken breasts cooked and cubed OR 1lb ground beef cooked and drained
1 cup salsa
2 TBS Taco Seasoning (or to taste for a more mild or spicy flavor)
3 cups of broth/water to cover
Salt and pepper to taste
Dump it all in a crock pot simmer all day! Then serve with chips or over rice or with quesadillas! YUMM!
The Hubbs and I both really enjoyed this and I'll definitely make it again. I though it was a little thin so I might add some wondra or flour to thicken next time depending on how I am serving it. Be warned the rotel makes it a bit spicy so if you like mild try a different canned diced tomato mix.
~LuLu
Taco Soup
1 can of corn
1 can of black beans
1 can of red beans
1 can of rotel
2-3 chicken breasts cooked and cubed OR 1lb ground beef cooked and drained
1 cup salsa
2 TBS Taco Seasoning (or to taste for a more mild or spicy flavor)
3 cups of broth/water to cover
Salt and pepper to taste
Dump it all in a crock pot simmer all day! Then serve with chips or over rice or with quesadillas! YUMM!
The Hubbs and I both really enjoyed this and I'll definitely make it again. I though it was a little thin so I might add some wondra or flour to thicken next time depending on how I am serving it. Be warned the rotel makes it a bit spicy so if you like mild try a different canned diced tomato mix.
~LuLu
Wednesday, October 13, 2010
Meatloaf Muffins
Welcome To Tasty Tuesday!

1 pound ground beef or other ground meat
1 6 oz box of Store bought stuffing mix (like Stove top)
1 cup water
ketchup
3/4 cup - ish shredded cheddar cheese
In a bowl, mix together ground meat, stuffing mix, and water. Roll mixture into 12 balls and press into the greased cups of muffin tin. Push your thumb into the top of the meat in the cups to make a small indentation and fill with ketchup.
Bake at 350 degrees for about 30 minutes. Then sprinkle the tops with shredded cheese and return to the oven for an additional 5 minutes or until the cheese looks melty and delicious.
Not only was this simple it was also very tasty. My husband REALLY enjoyed it even though he isn't normally a fan of stuffing! I deffinately give it 4 our of 5 stars. The simplicity, taste, and speed is going to make these guys a go to in my meal planning. Now for stuffing mix to go on sale..... Hummmmmm Thanksgiving is coming soon!
Friday, October 8, 2010
Halloween Wreath

The hubby likes it and that's all that matters. I believe he said "you know babe this is pretty awesome... I really like it" Needless to say I had a HUGE grin on my face! That man is amazing!
So here is how I did this wreath but crafts and sutch has great pictures too!
Materials:

Most of these are from the dollar store!! Yay! The glitter, paint, and glue gun I had and the spiders came in a big bag of spider webbing from the dollar store last year.
The Process:

So grab a hand full of your moss (tug hard if its stuck) then using your glue gun haphazardly drizzle glue over a 2 - 4 inch section of your wreath frame and attach the moss. Continue until the frame is covered.

This was my crazy method for glittering the spiders since I had already cut the ring portion of the spiders off I hot glued them to long wooden toothpicks from the kitchen and then used a Styrofoam plate to hold them up like a creepy Halloween bug collection. Then I painted on my glitter glue and let them dry.
Apparently this is where I stopped taking pictures because the camera battery died and I was too impatient to wait! LOL
Then using a blend of black, white, and gray paint I painted the sign. To get my words on the sign I printed them on my regular boring paper. Then cut it down to the size of the words with a little extra border of paper. Then on the back of the paper I shaded the entire area with a regular pencil. I then laid that on top of my lovely dry painted piece of wood and traced the out line of the words. The pencil on the back of the paper works as a transfer medium and you are left with a pencil out line of the words to fill in with paint. Then I painted the words onto the sign using a very small paint brush. Added the sign with left over twine and spread out my spiders in various positions around the wreath.
TA DA!!
~LuLu
Monday, October 4, 2010
Boy have I been busy!
Coupons:
Since I've quit my job 2 things have happened.... 1 I have more time... 2 we have less money. Funny how that works out! So to save money (and because its my secret addiction) I've been clipping coupons! Yay coupons I'm so glad to have you back in my life! I was previously using The Grocery Game... and LOVED it, but its 10 bucks a month which is more than fair, but the "upgrades" are supposed to make it fancy make it a pain!
Then after finding Addicted to Saving My heart is stolen.. Plus its free!!
I also like Southern Savers because Florida IS the south! In fact its almost as far SOUTH as you can go in the USA! Plus they have a Publix section where shopping, saving, and working truly are a pleasure!
Gardening:
I've been hoeing, pulling weeds, digging, shoveling, and trying to turn a section of my front walkway into a veggie and herb garden. However, to do so there are some very unruly shrubs that I am having toYank pull shovel rip pull muscles trying to remove their crazy root structures!
PLUS I went into my back yard where last years garden was and my potatoes that did terrible last year apparently have chosen this year to plant them selves and GROWWWWW! So I'll baby them a little and see if I get some potatoes!
Planting plans.... Current Tomatoes (so delicious and tiny), cilantro, oregano, Jalapeno, Basil, Broccoli (maybe) and what ever else my hippie mother sneaks into my yard when I'm not looking.
Cleaning:
Apparently Spring cleaning has NOTHING on fall cleaning in the mad mixed up world of LuLu! I've fully cleaned the counters, organized the spice cabinet, vitamin cabinet, Coffee stock, boxed up seldom never used items from the kitchen, eliminated cups and glasses that we don't use, and managed to bake, cook, and have a home cooked meal every night.
I don't know how long I can keep up this pace! Plus I've been sneaking in a crafty project or two which I'll sneak you a peak of soon!
~LuLu
Since I've quit my job 2 things have happened.... 1 I have more time... 2 we have less money. Funny how that works out! So to save money (and because its my secret addiction) I've been clipping coupons! Yay coupons I'm so glad to have you back in my life! I was previously using The Grocery Game... and LOVED it, but its 10 bucks a month which is more than fair, but the "upgrades" are supposed to make it fancy make it a pain!
Then after finding Addicted to Saving My heart is stolen.. Plus its free!!
I also like Southern Savers because Florida IS the south! In fact its almost as far SOUTH as you can go in the USA! Plus they have a Publix section where shopping, saving, and working truly are a pleasure!
Gardening:
I've been hoeing, pulling weeds, digging, shoveling, and trying to turn a section of my front walkway into a veggie and herb garden. However, to do so there are some very unruly shrubs that I am having to
PLUS I went into my back yard where last years garden was and my potatoes that did terrible last year apparently have chosen this year to plant them selves and GROWWWWW! So I'll baby them a little and see if I get some potatoes!
Planting plans.... Current Tomatoes (so delicious and tiny), cilantro, oregano, Jalapeno, Basil, Broccoli (maybe) and what ever else my hippie mother sneaks into my yard when I'm not looking.
Cleaning:
Apparently Spring cleaning has NOTHING on fall cleaning in the mad mixed up world of LuLu! I've fully cleaned the counters, organized the spice cabinet, vitamin cabinet, Coffee stock, boxed up seldom never used items from the kitchen, eliminated cups and glasses that we don't use, and managed to bake, cook, and have a home cooked meal every night.
I don't know how long I can keep up this pace! Plus I've been sneaking in a crafty project or two which I'll sneak you a peak of soon!
~LuLu
Subscribe to:
Posts (Atom)